 My son and/or my son and I have built nine recumbent bikes and we both frequent several of the bicycle DIY building sites. Two of the most requested bikes I see are bikes of no welding necessary and bikes made of aluminum. Well, N55 in collaboration with Till Wolfer have made available open source plans for a recumbent trike that requires no welding and is made of standard aluminum.
I’ve already seen Yea and Nay comment around the internet. Question of the steering (it does not use Ackermann steering geometry) and the durability of aluminum has been questioned.
(EDIT: This trike does indeed have Ackermann steering, I just didn’t understand with my first looks at the plans. With my understanding now, it doesn’t have camber/caster and the kingpin runs parallel to the wheel. I don’t think it would self center very well. These are all easy points to address.)
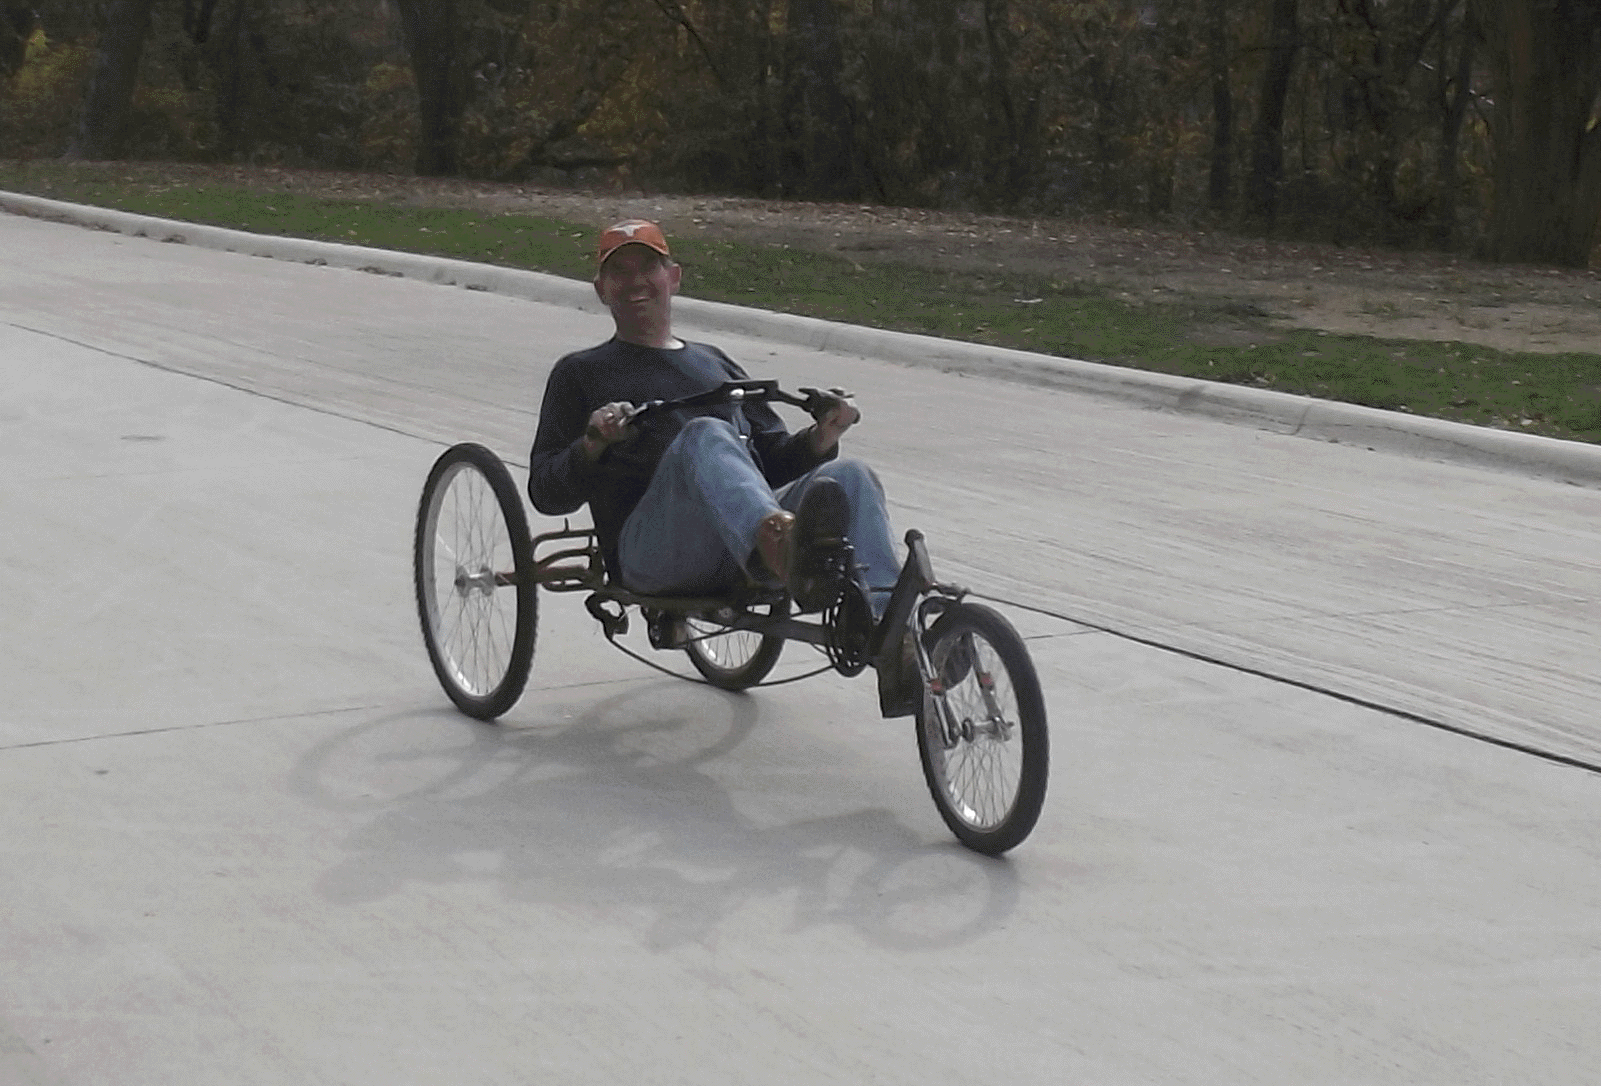
Our biggest complaint on the building we have done so far with mild steel has been finished weight. The XYZNODES Trike weights in at 18 lbs for the frame on the single seat version.
To me the XYZNODES is not a pretty trike, but you can always cover it up with a velomobile body that looks great. I’ve always wanted a velomobile anyway.
My son and I have had a great time building trikes and bikes together but it is not always convienent for us to get together because of distance or work schedules. I also have a defibrillator implant and cannot weld. For those reasons, I am going to have a real investigation into the building of the N55 trike called XYZNODES. I’m not saying that I will build one, but I’m excited about looking into it.
The free open source plans can be downloaded from the N55 site. The downloadable PDF has all the measurements for cutting and drilling but void of any assembly instructions. I’ve yet to understand what holds the bottom bracket shell in the crank box. I think a self support forum would help a lot and advance the cause.
I know this trike is going to get a lot of attention. Check it out.
Leave a comment and let me know what you think of it.
https://texasrecumbents.wordpress.com/2012/10/19/video-of-a-no-weld-aluminum-trike/
https://texasrecumbents.wordpress.com/2012/09/27/additional-resources-for-no-weld-trike/
https://texasrecumbents.wordpress.com/2012/09/23/no-weld-cargotouring-trike-design/

No front derailer. No details in the plans how the crank is attached.
The attachment of the rear derailer looks sketchy. It not at the right angle.
The geometry of the cranks to the seat doesn’t seem right to me.
Bolt holes will elongate with use.
Seat is kinda high but this could be a + or a – depending on your needs.
The derailer issues could be worked around by using an internal geared hub. $$$?
I don’t mind the looks of it at all. To me the ability to say that “I built it myself” over comes a lot of looks issues.
Especialy when considering that this trike should come in under $400 to build. Most of that is in buying 20″ rims and disc brakes.
Maybe I’m just dense but I’ve looked at the plans several times and still don’t understand how the cranks mount. The rest of the trike looks so simple.
Some of the pictures on their site have internally geared rear hubs. The rear derailleur in one of the pictures is mounted at an odd angle. You may need to come up with a workaround for that.
If after a long period of time some of the bolt holes at stress points did elongate, that part would be so easy to replace.
I found your blog looking for better constrction details. I’m wondering how the crank mounts too and have assumed they use a type available in Denmark we haven’t seen in North America. As it is that leaves you with a 5 or 6 speed and in a recumbent that’s simply not enough. Thank you for mentioning the Ackerman thing. I was killing myself trying to figure out the stearing geometry. I get how the holes in the ends of the strearing bridge components being different distances from the end give you camber, but I can’t for the life of me see how they get any Caster. Steering component ST2 is twisted alittle but still 90degree’s to the bridge. Unless I’m missing something. Do the top and bottom bridge components attach on an angle? On the first page I can’t find the hole to bolt to the top frame rail. I have to print this thing off and try a scale model in popsicle sticks and brads.
Just went back and had another look. Would Pieces ST3 be giving some Ackerman effect? They bring the connections to the tie rod in 3.5 inches?
The web site shows a lot of pics of the model with the electric motor and back seat, and the single seems to have grown a trailer in a hurry. Anyone else think the model the plans are published of looks like a good candidate for a nose plant? You sit up fairly high, center of mass is awful close to the front axle, and it appears to be short coupled. (Distance between front and rear axles too close) I’m thinking the longer model would be a better bet.
Assuming I can source 1 inch aluminum square locally, this might make an interesting test bed machine. Perhaps play with plywood gussets to address the ackerman issues.
See if I can figure out the cargo version on my own.
I see a few short comings but in part these may be my not understanding some of the design.
The cargo version interest me the most. I see no difference in the design other than longer rails and added materials for the cargo boxes. An area that is designed to carry cargo. Located in the center of the trike with all tires sharing the load. Now design a velomobile body around this design with doors on the side that access the cargo area from the outside. A convenient space to carry cargo other than in nooks and crannies like most commercial velomobiles.
Forgetting that this is a no weld aluminum trike, if I were to build with conventional methods this is a design that I would follow for a velomobile. Would it not make a great touring trike.
No different in the design other than longer rails…. yes but you may want to look at the size of Steering Bridge Component ST-3. If you lengthen the rails you may have to shorted the component to allow for Ackerman steering.
Now I have checked locally and although my local Aluminum supplier does not stock 1″ Square, they can get it in for me for about $2 a foot.
(metric conversions
20m stock, 66′ $132 ish
Bolts 6mm/ 1/4″
90mm/ 3.5″
60mm/ 2.5″
40mm/ 1.5″
30mm/ 1″
I’m thinking if I set up my table saw for 1″ , I could cut up $6 worth of 2×4’s into 8′ lengths of 1×1 and do a mock up in spruce suitable for working out the kinks in front crank, baggage compartment, fitting seats etc. Set up a jig for my drill press.
If there’s a building forum for this design please direct me. Otherwise how about this is it and thank you for hosting it!
This is not a very convenient format for a forum, but I will see about setting up a forum format for us to use. This blog will be fine until that happens. I don’t mind at all.
I did take a quick look and see that there are several Free Forums that we might use. I’ll see about setting one up tonight.
George
This is discussed in the swedish HPV forum too. It looks fine to me (ugly, but as you say, the ugliness could be hidden below a shell), and not needing to weld sounds great. Then, on the other hand, the well designed Mosquito doesn’t need welding either. Can be built from mostly wood and glue.
The Mosquito is a piece of art. I have followed their build for some time. I think the skills and equipment needed for the level of woodworking needed for that quality of build exceed my resources. I do think the XYZNODES is within my abilities and equipment requirements. If I do see this through to completion, it will be with a skin on frame cover.
I looked for the Swedish HPV forum you mentioned and did not find it. Do you have link?
Thanks
George
I have set up a new forum for us to use. Generically I named it No-Weld HPV Forum. It is not ready to use. I will try to get it set up this weekend. You may take a quick peek here. http://noweldhpv.forumotion.com
In the meantime you may make post here and I will cut and paste to the new forum.
George
It is a unique design and I still wonder how it would work. I like the idea of a trike though I have never tried to build one. I also prefer bikes make of aluminum and no welding is certainly appealing. I have to see what other say about it.
Now I understand. It does have Ackerman steering. I don’t know how many times I looked at the plans (misleading) and photos on the N55 site, I just was not understanding.
Now I see the other pivot point. I’ll try to get some drawings up to show what I mean. If you look to the center side of the steer handle there is another pivot point. That point and the pivot point at the end of the axle set the ackerman angle.
This steering setup is rather simplistic. There is no toe in adjustment or camber/caster.
The kingpin is also running parallel to the wheel.
The steering will function as is, although improvements could be made as mods after the build.
Gordon Seiter also pointed out the Ackerman steering in his post also, I just did not understand at the time. The Ackerman could be changed by changing the offset for the longer cargo trike.
There is a group who builds these trikes in my town and I visited them to have a look at their cargo trike. While I really like the idea of building your own trike out of a bunch of screws and some aluminum tubing the actual trike left me underwhelmed to say the least.
The steering in particular is terrible. The idea of going down hill at any speed with this thing looks to me like a suicide waiting to happen. No kidding.
I just clocked 7000 km on my recumbent trike (ICE Sprint) yesterday and don’t feel even the least concerned going down hill at over 50 km/h with it. It is just great fun, easy and precise to steer and save to brake.
Thanks for the information Marc. I know there is a lot of room for improvement. I have many changes already complied in my mind. Hope to have time to get it on paper soon.
Here is a video I found today. I don’t even remember how I followed to this link.
it looks like its running 2 much camber at moment n front wheels need 2 b further fwd fo more stability but its got promise there n looks kewl
Did anyone have any insight on the crank assemblies, where to purchase, what type, etc.?
I’ll see if I can find the part and part number for you. Its an off the shelf part that is modified for this purpose.
I think this is the aluminum clamp used in the pictures to hold the BB to the frame. IKEA 701.066.06 $3.50
Or one with 2 ears IKEA 600.762.85 $3.50 Suspension fitting with 2 holders, aluminium
Google these part numbers and see if they are correct.
George
Try this then…
Tribolt
http://tribolttrike.blogspot.nl/?zx=d7e6db1d9b7d9e3e
THe owner of the page and main man, Ron, will help you with any queries you have… and guide you through out the process…
really sound and well intended man, who has put, loads of miles on his DIY trikes!!
hope i´m not to late
Has anyone seen (or built) a top/shell för the xyz recumbent trike? Can’t find any pictures on the Web.